Introduction
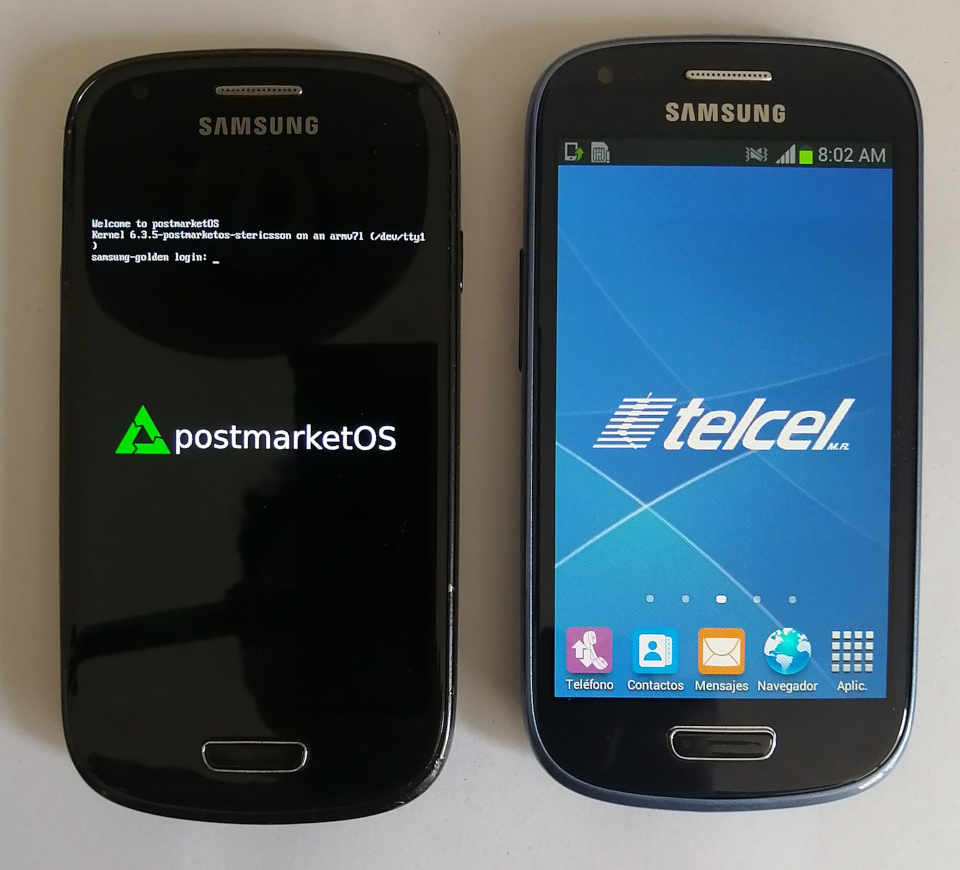
I came across postmarketOS a while back. I had an old Samsung S3 Mini lying around, and I was curious if I could repurpose it for Linux projects. However, my knowledge and skills weren't sufficient to grasp the entire installation process. Unfortunately, there weren't many clear and concise tutorials available online. While the postmarketOS website has documentation, I found it lacked specific examples, making it challenging to follow.
My journey to postmarketOS success wasn't immediate. It wasn't until late 2023 that I successfully installed a custom u-boot on my phone. Then, in early 2024, I was finally able to flash the kernel and root filesystem.
This tutorial aims to consolidate the information I've gathered and present it as a practical guide. My goal is to provide a clear, step-by-step example for installing postmarketOS on a smartphone.
This tutorial also aims to inspire others to give their old smartphones a second life. By installing a new operating system, you can prevent electronic waste and repurpose these devices for various projects. After all, these smartphones are essentially small computers, packed with features similar to a Raspberry Pi, but often with additional built-in peripherals like cameras and touchscreens.
System setup
This is the setup I used for this tutorial: - Ubuntu 23.04 - Python 3.11.4 - pmbootstrap 2.3.0
Flashing a custom u-boot on the Samsung S3 mini
First, we need to flash a custom u-boot. This step is important because it allows us to then flash and boot the postmarketOS kernel. Here are the steps to flash it on the device:
Install heimdall tool
To flash the custom u-boot, we'll need a tool called heimdall. You can install it on your computer by running the following command:
sudo apt-get install heimdall-flash
Testing heimdall tool
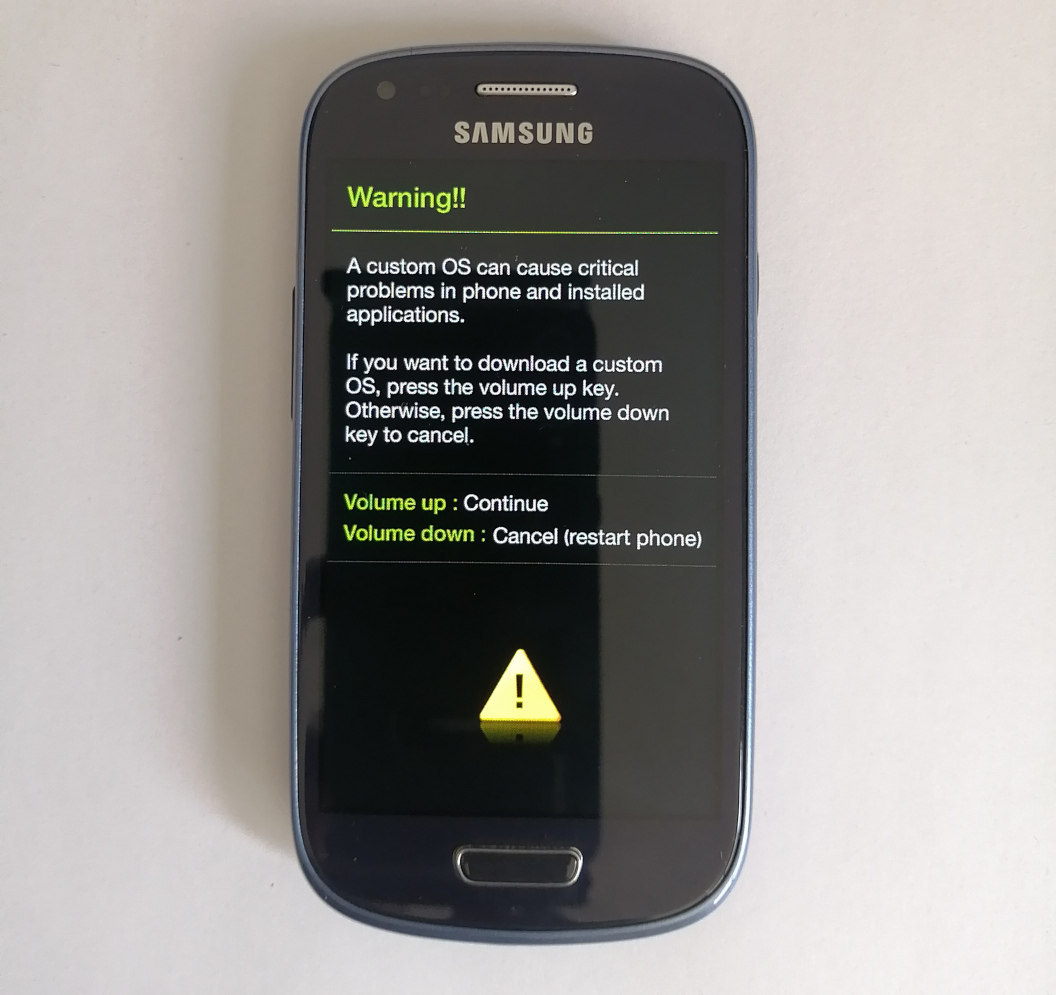
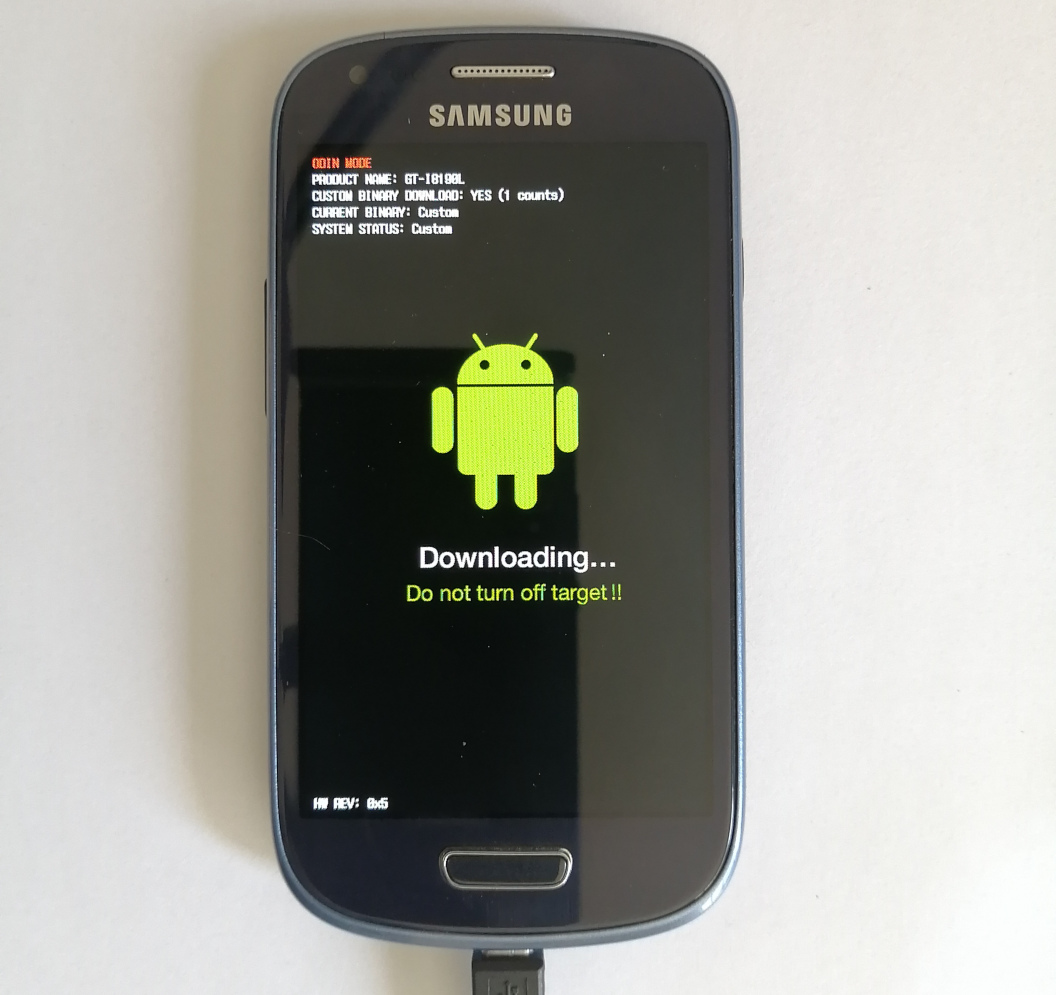
Before installing the custom u-boot, we need to verify that your computer can detect the device. Here's how to enter download mode on your Samsung S3 Mini: - Power off the smartphone completely. - Boot into download mode. To do this, press and hold the following keys simultaneously: VOLUME DOWN + HOME + POWER
Press the key VOLUME UP to continue.
Connect the phone to the computer and make sure that it can detects the device by executing the following command:
lsusb
...
Bus 001 Device 022: ID 04e8:685d Samsung Electronics Co., Ltd GT-I9100 Phone [Galaxy S II] (Download mode)
...
Then, get the PIT information (Partition Information Table). The --no-reboot option tells the device not to reboot after executing the command.
heimdall print-pit --no-reboot
Download the custom u-boot for the chipset
After we verified the tool can communicate with the device, download one of the prebuilt u-boot binaries from the following github repo: Releases · stericsson-mainline/u-boot · GitHub. For this tutorial I downloaded the release version U-Boot 2023.04 for ST-Ericsson NovaThor U8500.
Flashing the bootloader on the device
WARNING: EXECUTING THE FOLLOWING STEP MAY BRICKED YOUR DEVICE.
The device wiki provides a table listing U-boot binary formats for different phone versions [1]. For our specific phone model, the required file is u-boot.img. In my case I rename it as u-boot-2023-04.img. To flash this file onto your device, run the following command:
heimdall flash --Kernel u-boot-2023-04.img
Here is the output of the command:
Heimdall v1.4.2

Copyright (c) 2010-2017 Benjamin Dobell, Glass Echidna
http://www.glassechidna.com.au/

This software is provided free of charge. Copying and redistribution is
encouraged.

If you appreciate this software and you would like to support future
development please consider donating:
http://www.glassechidna.com.au/donate/

Initialising connection...
Detecting device...
Claiming interface...
Setting up interface...

Initialising protocol...
Protocol initialisation successful.

Beginning session...

Some devices may take up to 2 minutes to respond.
Please be patient!

Session begun.

Downloading device's PIT file...
PIT file download successful.

Uploading Kernel
100%
Kernel upload successful

Ending session...
Rebooting device...
Releasing device interface...
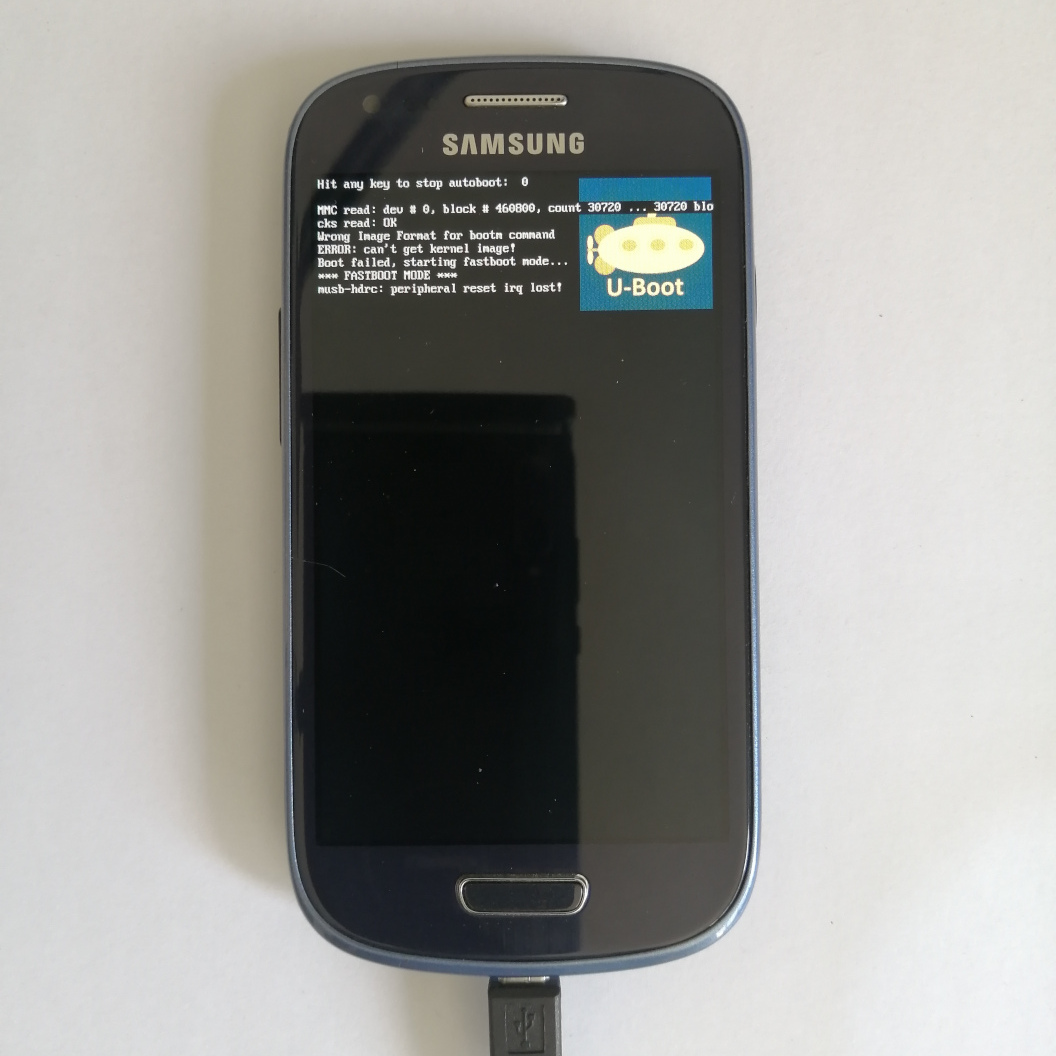
Once the flashing process is complete, your device will reboot. However, since it doesn't have a kernel installed yet, it will enter fastboot mode.
Installing pmbootstrap and run configuration for Samsung Galaxy S3 Mini
To install pmbootstrap follow the installation steps described in the wiki [2]:
git clone --depth=1 https://gitlab.com/postmarketOS/pmbootstrap.git
mkdir -p ~/.local/bin
ln -s "$PWD/pmbootstrap/pmbootstrap.py" ~/.local/bin/pmbootstrap
In my case I had to edit the .bashrc file to append the directory we created in the previous step. This allows the operating system to find the program.
# pmbootstrap
export PATH=$PATH:/home/ubuntu/.local/bin
Open a terminal and verifiy pmbootstrap is available on the system:
pmbootstrap --version
Running the configuration tool for Samsung Galaxy S3 Mini
Before initializing the pmbootstrap configuration, it's important to create a dedicated directory to store the device-specific configuration files. This is where you'll obtain the kernel and root filesystem for your smartphone.
mkdir samsung-golden
pmbootstrap init
The pmbootstrap program will prompt you with several configuration options. For this tutorial, we'll focus on installing postmarketOS with just the console interface, although other options include a desktop environment. Here are the specific settings I chose:
Work path [/home/user/.local/var/pmbootstrap]: /home/user/samsung-golden
Channel [edge]: edge
Vendor [qemu]: samsung
Device codename: golden
Kernel [downstream]: mainline
Username [user]: tinkering_at_night
Provider [default]: default
User interface [console]: console
Change them? (y/n) [n]: n
Extra packages [none]: none
Use this timezone instead of GMT? (y/n) [y]: y
Locale [en_US]: en_US
Device hostname (short form, e.g. 'foo') [samsung-golden]: samsung-golden
Build outdated packages during 'pmbootstrap install'? (y/n) [n]: y
Flashing postmarketOS kernel onto the smartphone
Flash the kernel onto the device with the following command:
pmbootstrap flasher flash_kernel
This is the output of the command:
[13:18:37] Update package index for x86_64 (4 file(s))
[13:18:45] Download http://dl-cdn.alpinelinux.org/alpine/edge/main/x86_64/apk-tools-static-2.14.4-r0.apk
[13:18:47] (native) install alpine-base
[13:18:57] (native) install qemu-arm
[13:18:59] Register qemu binfmt (arm)
[13:18:59] (rootfs_samsung-golden) install alpine-base
[13:19:12] (rootfs_samsung-golden) install device-samsung-golden device-samsung-golden-kernel-mainline
[13:20:40] (rootfs_samsung-golden) install postmarketos-mkinitfs
[13:20:43] (rootfs_samsung-golden) mkinitfs postmarketos-stericsson
[13:20:53] (native) flash kernel postmarketos-stericsson
[13:20:53] (native) install android-tools
Sending 'boot' (7534 KB)                           OKAY [  0.949s]
Writing 'boot'                                     OKAY [  1.206s]
Finished. Total time: 2.446s
[13:21:19] You will get an IP automatically assigned to your USB interface shortly.
[13:21:19] Then you can connect to your device using ssh after pmOS has booted:
[13:21:19] ssh tinkering_at_night@172.16.42.1
[13:21:19] NOTE: If you enabled full disk encryption, you should make sure that Unl0kr has been properly configured for your device
[13:21:19] NOTE: chroot is still active (use 'pmbootstrap shutdown' as necessary)
[13:21:19] DONE!
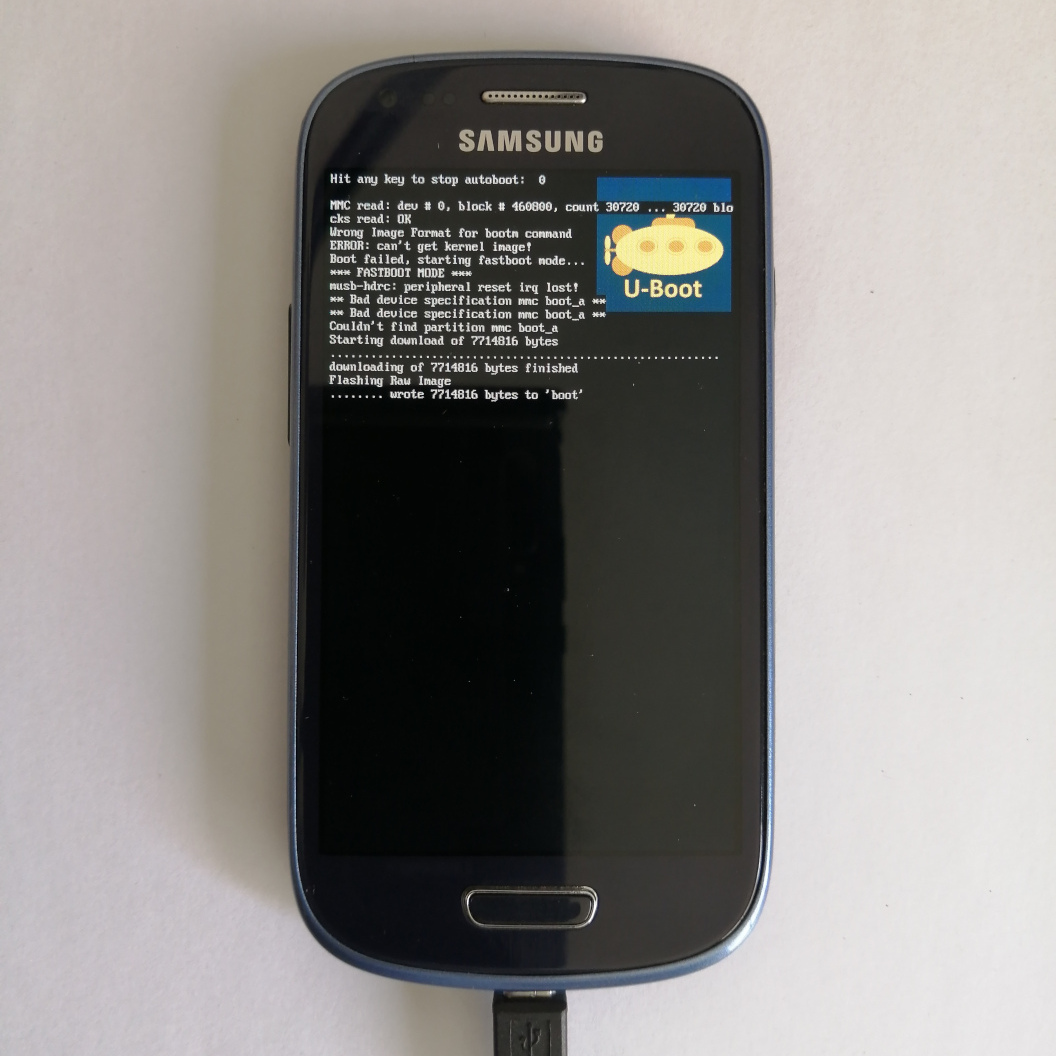
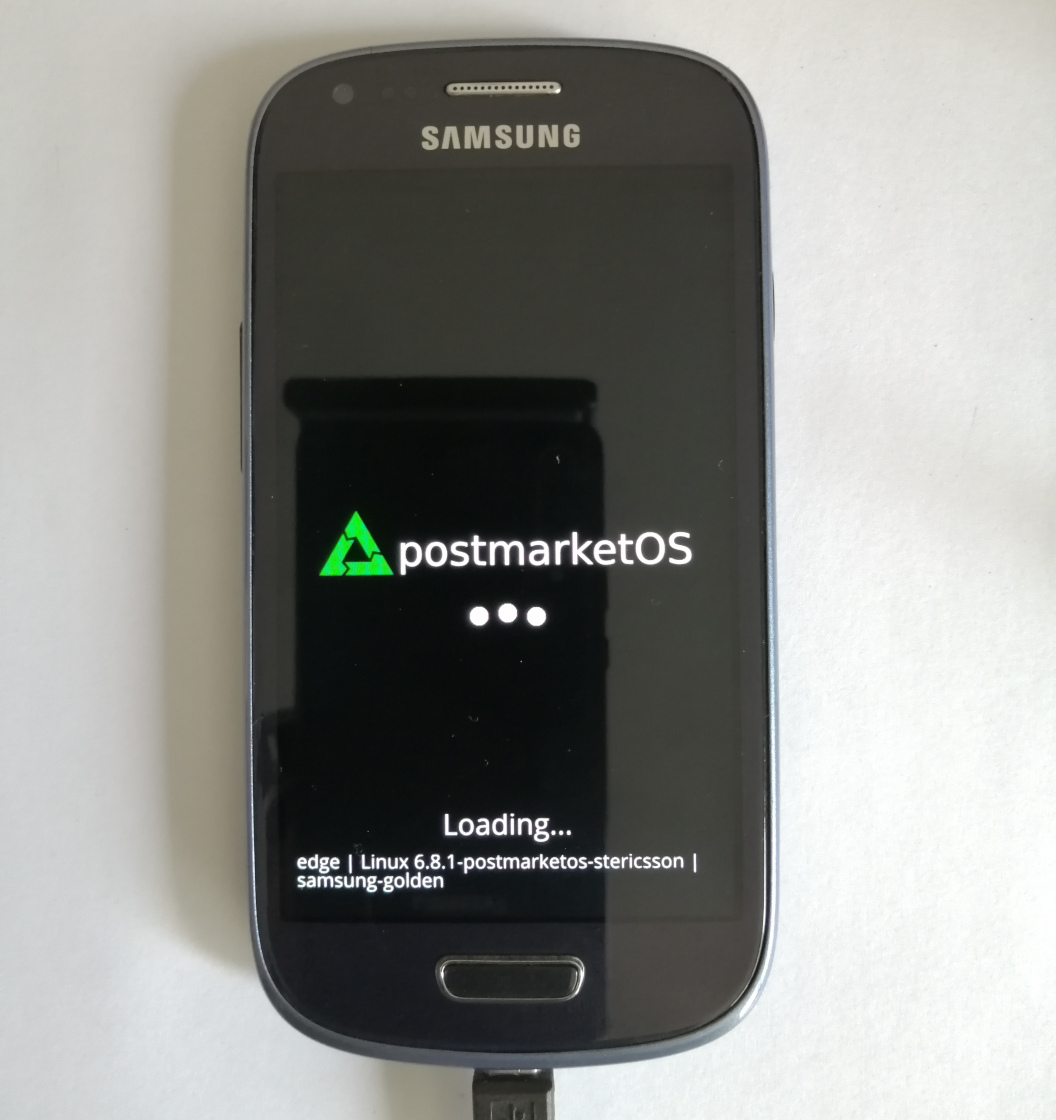
Once the flashing process is complete, press the Power button to reboot the smartphone. After the reboot the logo is displayed on the screen.
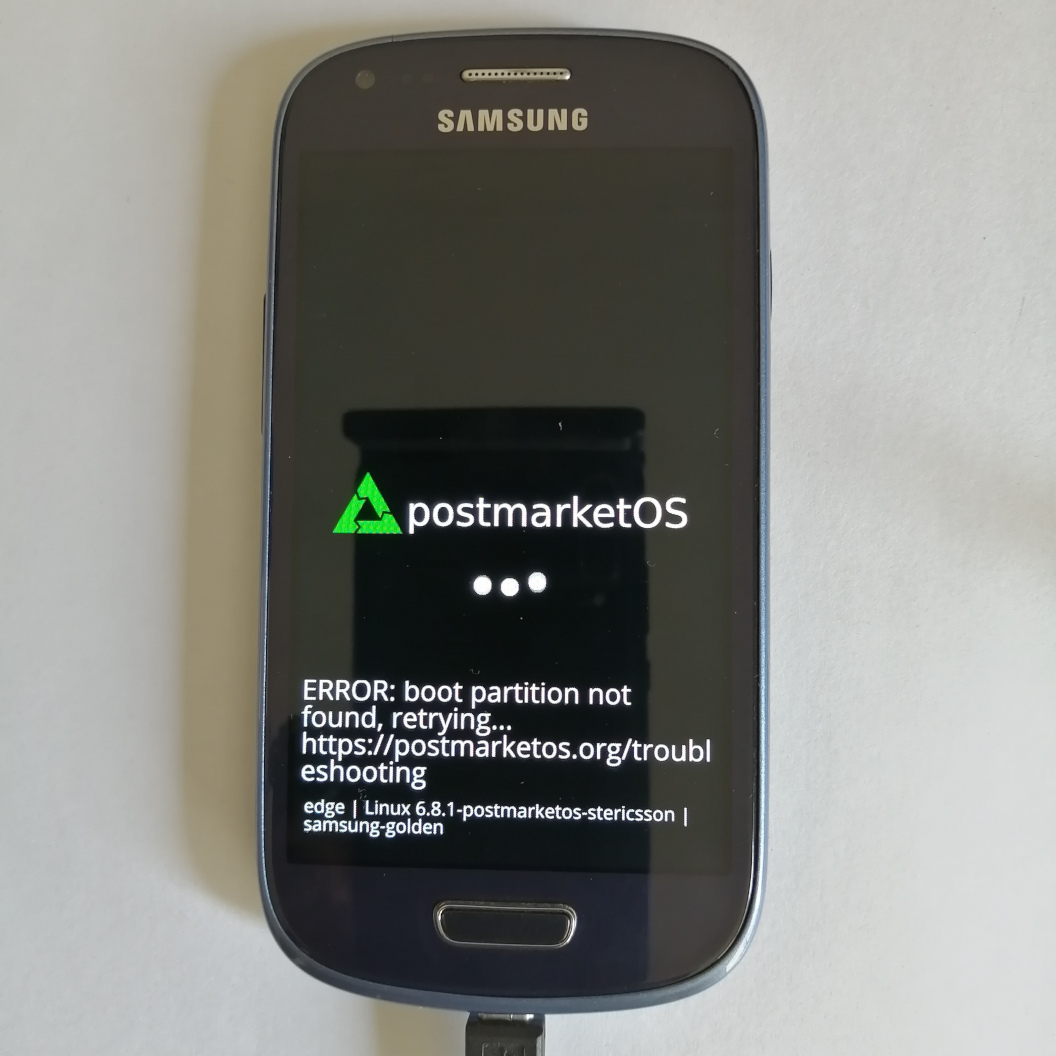
Since currently there is not a rootfs, the kernel shows the following error message:
How to re-flash kernel
In case you want to re-flash the kernel you have to reboot the smartphone and press the buttons Power + Volume Down + Home to enter in fastboot mode. Then execute the step to flash the kernel again.
Install rootfs on SD card
We need a SD card formated as ext4 to copy into it the rootfs. You can run the following command to format the SD card with that required format partition:
sudo mkfs -t ext4 /dev/sd
sudo mkfs -t ext4 /dev/sdd # For example
This is the output of the command. It will ask you for a password:
[10:45:04] *** (1/4) PREPARE NATIVE CHROOT ***
[10:45:06] (native) install cryptsetup util-linux parted
[10:45:16] *** (2/4) CREATE DEVICE ROOTFS ("samsung-golden") ***
[10:45:16] Register qemu binfmt (arm)
[10:45:18] Update package index for armv7 (4 file(s))
[10:45:25] Update package index for x86_64 (4 file(s))
[10:45:29] (rootfs_samsung-golden) install postmarketos-base device-samsung-golden postmarketos-ui-console device-samsung-golden-kernel-mainline device-samsung-golden-nonfree-firmware postmarketos-base-nofde font-twemoji
[10:46:50] (rootfs_samsung-golden) install device-samsung-golden device-samsung-golden-kernel-mainline
[10:46:55] (rootfs_samsung-golden) install postmarketos-mkinitfs
[10:46:58] (rootfs_samsung-golden) mkinitfs postmarketos-stericsson
[10:47:05]  *** SET LOGIN PASSWORD FOR: 'tinkering_at_night' ***
New password:
              Retype new password:
                                   passwd: password updated successfully
                                                                        [10:47:33] NOTE: No valid keymap specified for device
[10:47:36] *** (3/4) PREPARE INSTALL BLOCKDEVICE ***
[10:47:37] (native) mount /dev/install (host: /dev/sdd)
[10:47:37] EVERYTHING ON /dev/sdd WILL BE ERASED! CONTINUE? (y/n) [n]: y
[10:48:00] (native) partition /dev/install (boot: 256M, reserved: 0M, root: the rest)
[10:48:00] (native) install e2fsprogs
[10:48:03] (native) format /dev/installp2 (root, ext4)
[10:48:29] (native) mount /dev/installp2 to /mnt/install
[10:48:29] (native) install e2fsprogs
[10:48:30] (native) format /dev/installp1 (boot, ext2), mount to /mnt/install/boot
[10:48:39] (native) create /etc/fstab
[10:48:40] (rootfs_samsung-golden) mkinitfs
[10:48:49] *** (4/4) FILL INSTALL BLOCKDEVICE ***
[10:48:49] (native) copy rootfs_samsung-golden to /mnt/install/
[10:48:51] Unmounting disk /dev/sdd (this may take a while to sync, please wait)
[10:50:38]
[10:50:38] *** FLASHING INFORMATION ***
[10:50:38] Run the following to flash your installation to the target device:
[10:50:38] * pmbootstrap flasher flash_kernel
[10:50:38]   Flashes the kernel + initramfs to your device:
[10:50:38]   /home/ubuntu/postmarketos/samsung-golden/chroot_rootfs_samsung-golden/boot
[10:50:38]   (NOTE: fastboot also supports booting the kernel/initramfs directly without flashing. Use 'pmbootstrap flasher boot' to do that.)
[10:50:38] * If the above steps do not work, you can also create symlinks to the generated files with 'pmbootstrap export' and flash outside of pmbootstrap.
[10:50:38]
[10:50:38] *** SSH DAEMON INFORMATION ***
[10:50:38] SSH daemon is enabled (disable with --no-sshd).
[10:50:38] Login as 'tinkering_at_night' with the password given during installation.
[10:50:38]
[10:50:38] *** FIREWALL INFORMATION ***
[10:50:38] Firewall is enabled, but will not work (no support in kernel config for nftables).
[10:50:38] If/when the kernel supports it in the future, it will work automatically.
[10:50:38] For more information: https://postmarketos.org/firewall
[10:50:38]
[10:50:38] NOTE: chroot is still active (use 'pmbootstrap shutdown' as necessary)
[10:50:38] DONE!
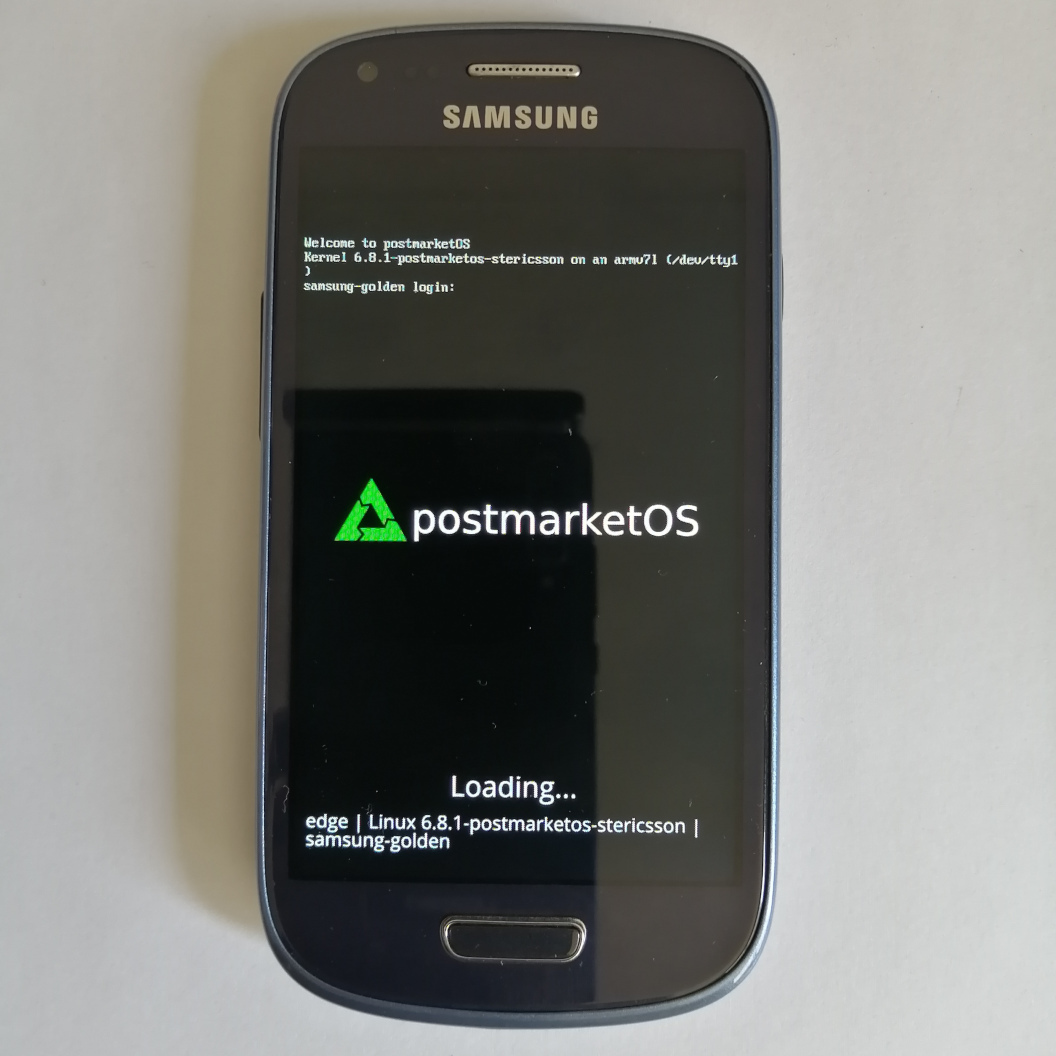
Insert the SD card in the SD card slot of the smartphone. After the kernel boots, the system mounts the root file system. You should see the following prompt:
Get serial console from the phone
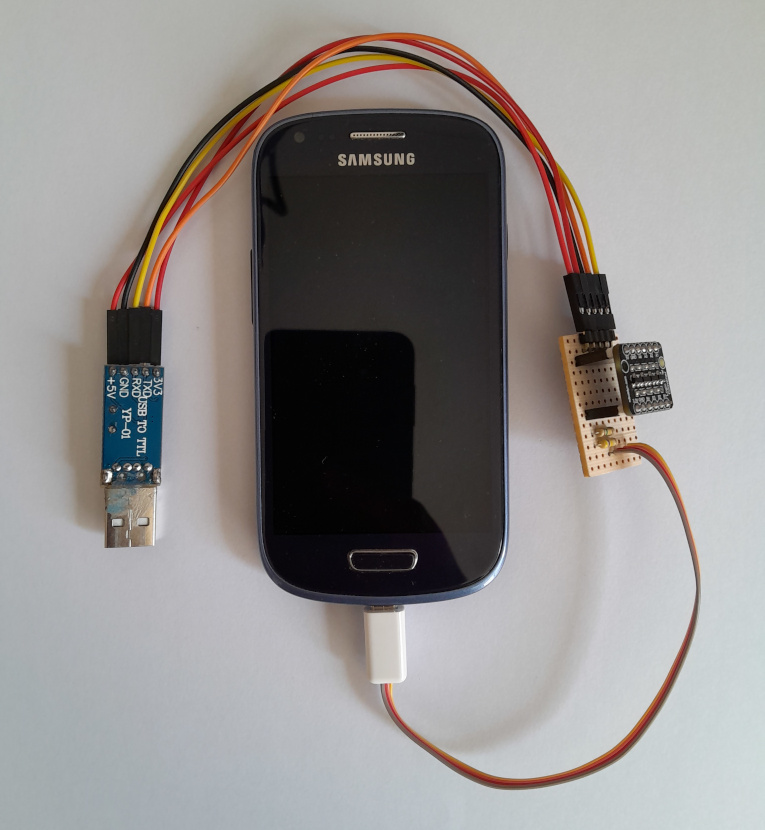
While we'll eventually need the console for further configuration, accessing it requires a serial cable connected to your phone. The phone utilizes the AB8500 Micro-USB Interface Controller, which allows serial communication when a resitor is placed between ID pin and GND [3]. Here's how to build a simple circuit to enable UART and grant access through the smartphone's micro USB port:
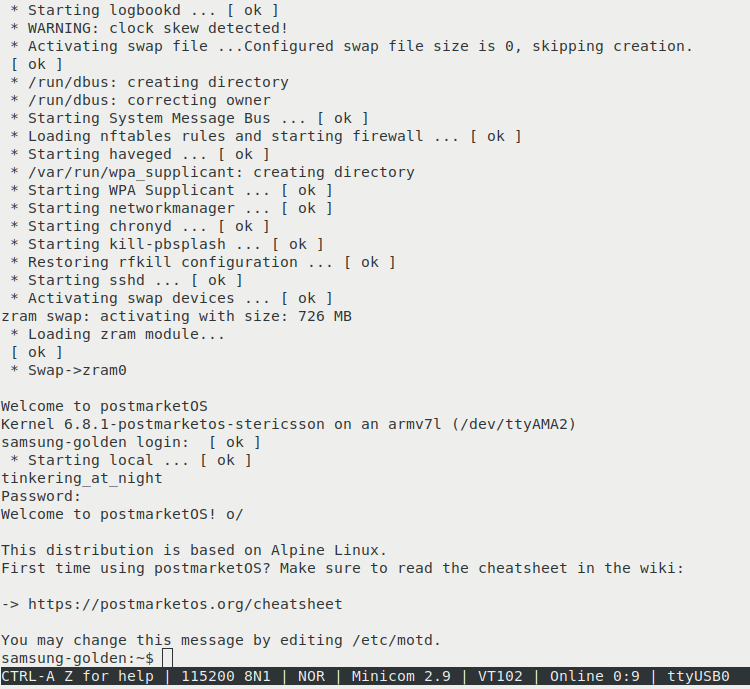
Connecting the serial cable to the computer should display a prompt like the one shown below:
Important Note: The Micro-USB interface operates at 3.3 volts. This means you might need a voltage level converter to connect a standard UART interface, which typically operates at 5 volts, to your phone's micro-USB port.
Next steps
My plan for these devices is to install eclipse-mosquitto to run a MQTT broker. I also intend to run LVGL on them. I hope this tutorial inspires you to try installing postmarketOS on your own smartphones. In the next post, I'll guide you through setting up WiFi on the device and connecting to it via SSH.
References:
- [1] ST-Ericsson NovaThor U8500 - U-boot - postmarketOS
- [2] Installation - From git
- [3] Micro-USB Interface Controller - postmarketOS
- ST-Ericsson_NovaThor_U8500 - postmarketOS
- Pmbootstrap - SD card - postmarketOS
Updates and fixes:
02/05/2025:
- Add screenshot of terminal prompt.
